 SearchChamp
Create your workspace and add a site
Understand how SearchChamp organizes your work into workspaces, brands, and sites — and add the site you want to optimize.
SearchChamp organizes everything into a simple hierarchy: a workspace holds one or more brands, and each brand holds one or more sites. Almost every feature is scoped to the site you have selected, so your first job is to add the site you want to work on.
Steps
Find your workspaces
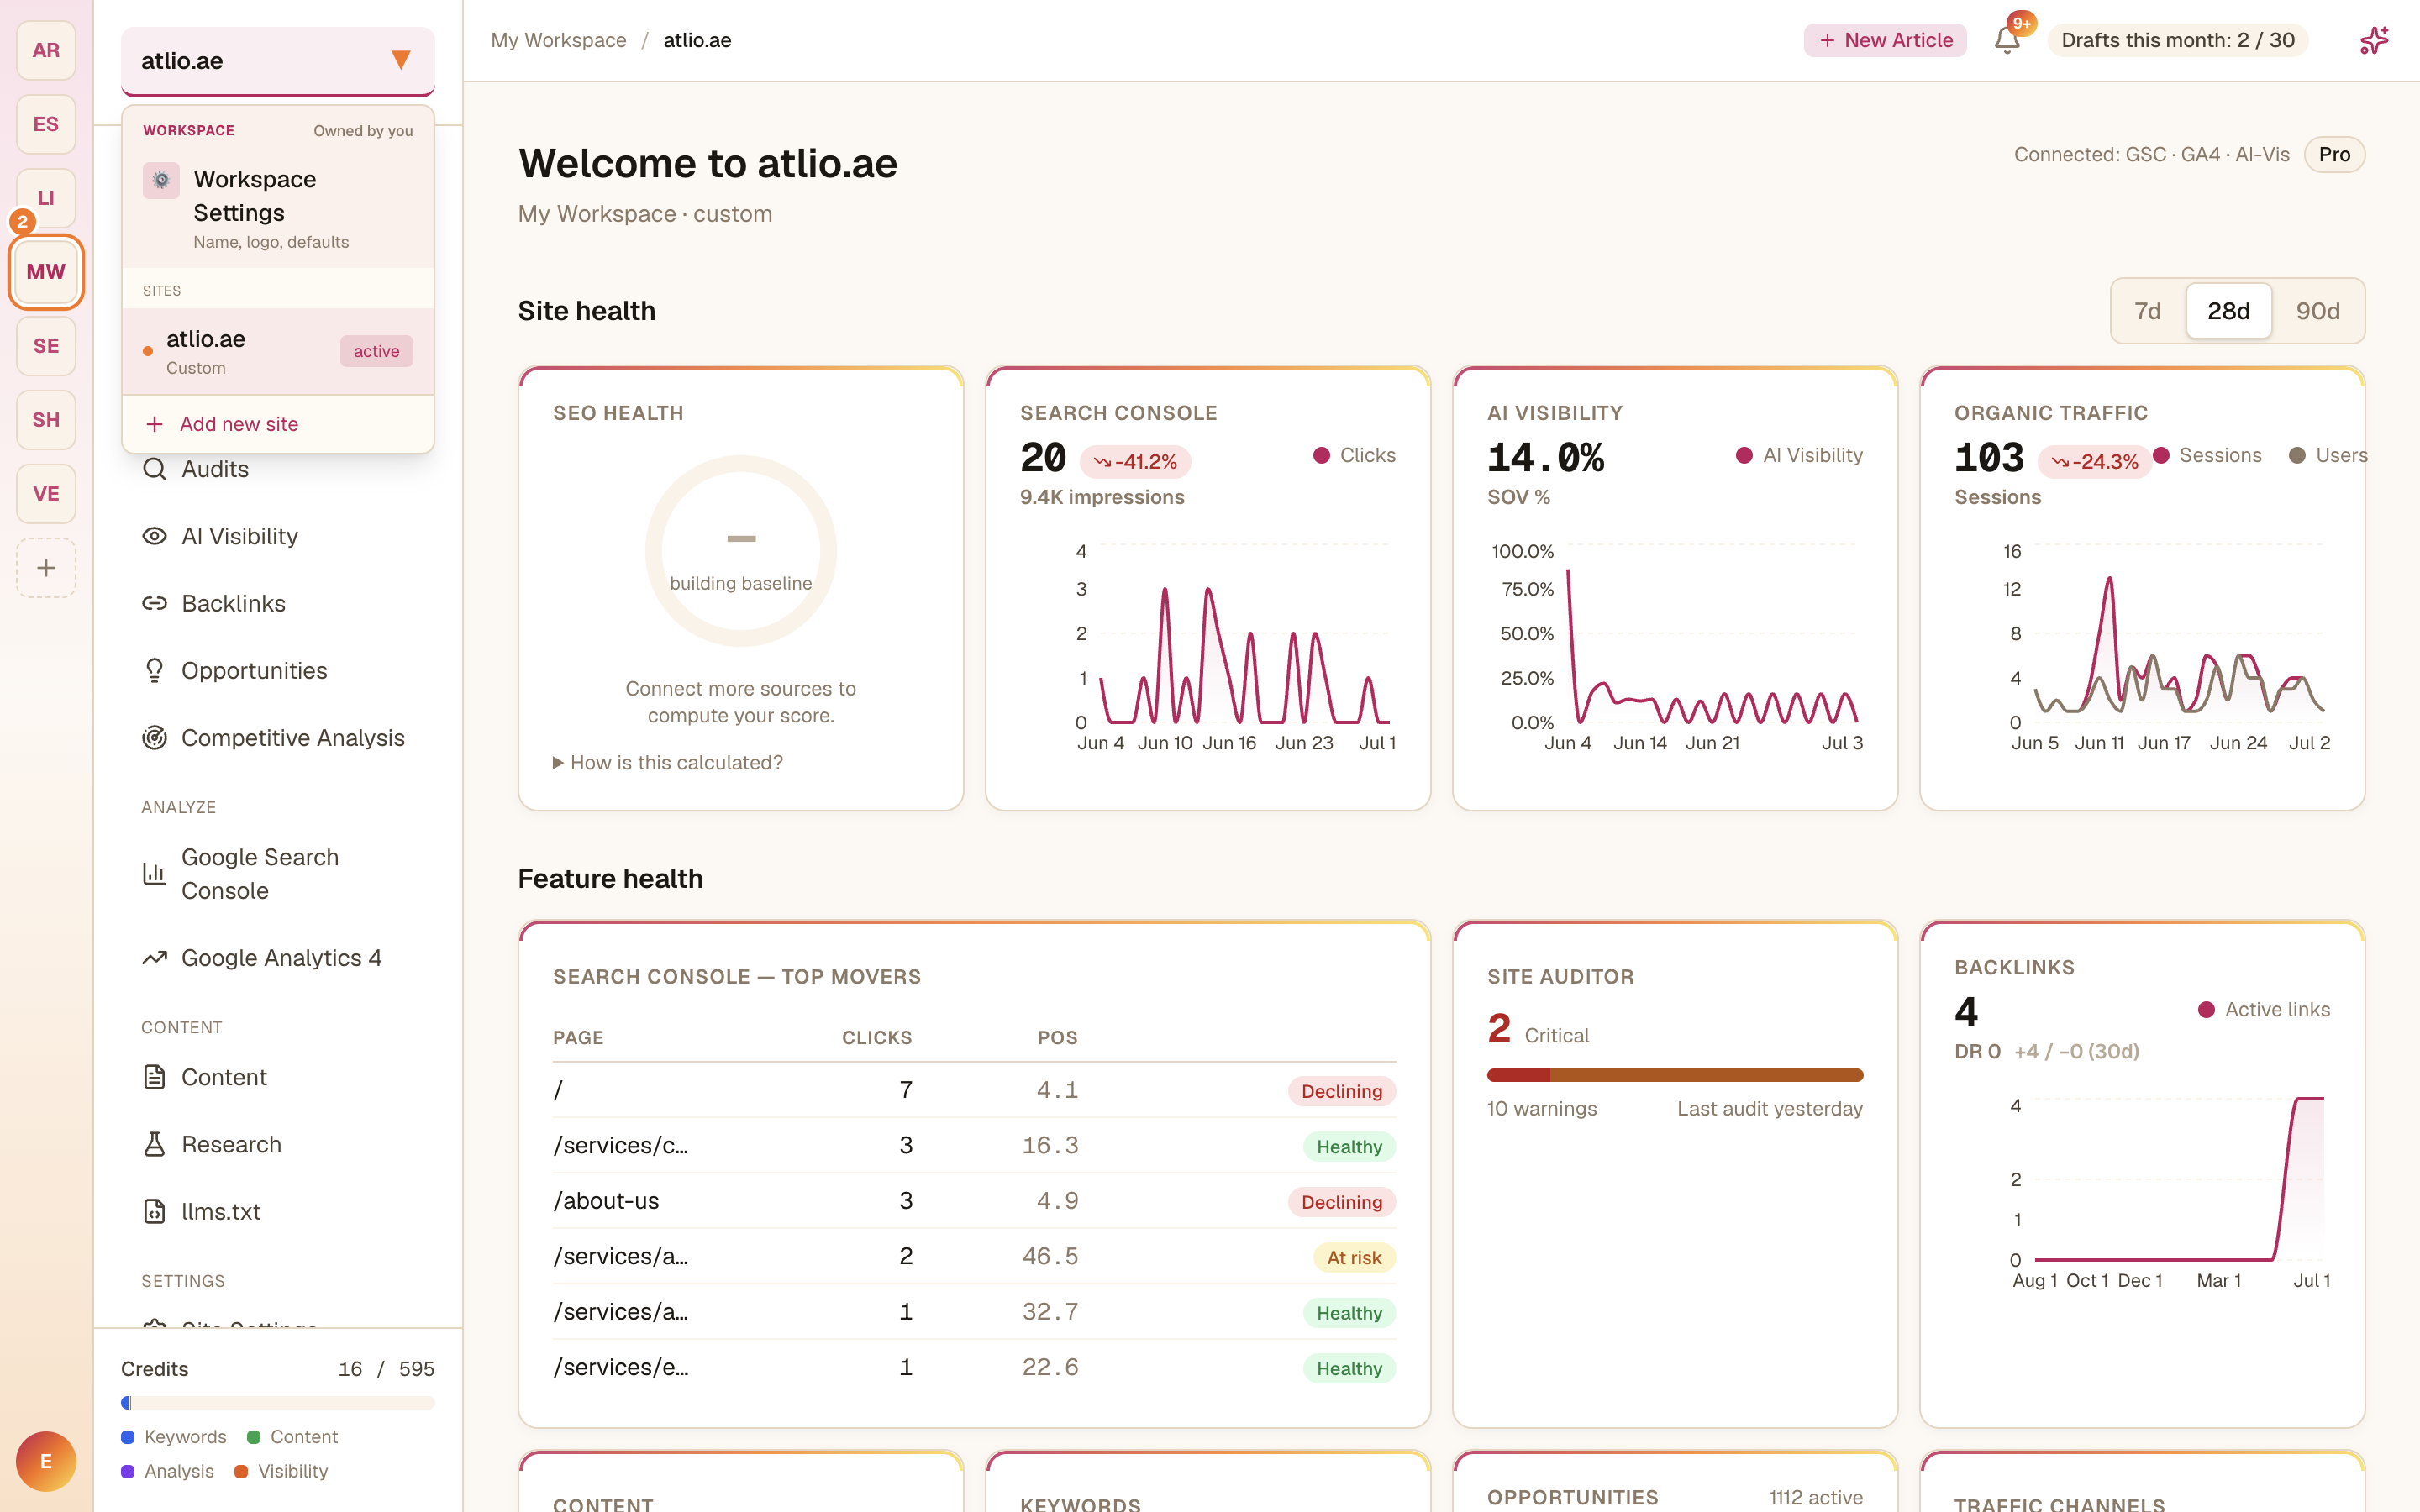
The far-left rail lists your workspaces — switch between them by selecting one, or select Add new workspace to create another (handy if you manage separate clients or brands).
Add a site
Open the site switcher at the top of the sidebar. It lists the sites in your current workspace, with Add new site to bring in another. Add the domain you want to optimize.
Configure the workspace
From the same switcher, open Workspace Settings to set the workspace name, logo, and defaults (like locale and time zone) that apply across its sites.
Verify and connect
With your site added, verify the domain and connect your data sources so the product works with real numbers.